

How to build a concrete ramp
These few basic steps works for all of our Ramp-Molds. Down below you'll find some special steps for Quarter-Molds. The instruction is so easy that I'm sure that you only need it for your first usage.
Step 0 - Preparing the working area
If you take care through the following steps it can be a really clean process, but you definitely should lay a foil underneath your working area to make sure your floor doesn't get dirty if you try it the first times.
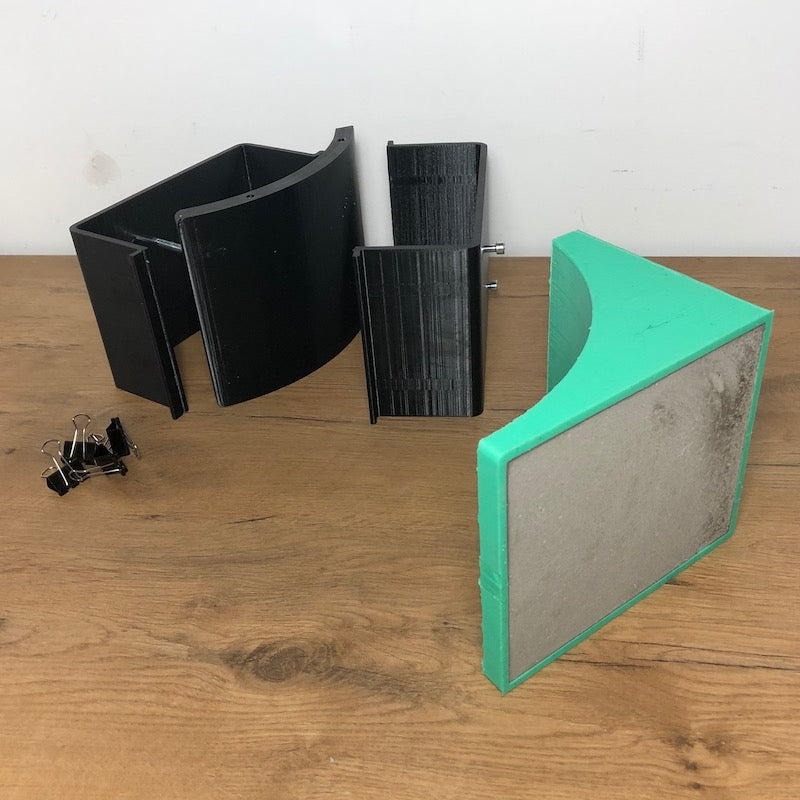
Step 1 - Preparing the Mold
- Make sure the mold is clean from dust, dirt and concrete from the last ramp.
- Spray in some mold release agent to make sure the mold get a perfect finish and can demolded easily (you can use salad oil instead as well)

Step 2 - Mixing the Concrete
- If you don't know which concrete to use, see the instruction by clicking HERE
- Read the instructions which is shown on the concrete-packgaging
- Think about how many concrete you need for your mold (there is a information on the mold frame about its filling volume)
- Prepair the following things:
- Fill in the cement powder in small steps in the bucket with the cold water. Don't forget to mix at the same time. Make sure you mix it till it gets a smooth and uniform compound.
- - bucket with correct amount of cold water for your concrete mix
- - Bucket with the correct amount o cement powder mix for your cement
- - Cordless screwdriver and some kind of paddle mixer (you get a paddle mixer in your local construction store for a few bucks)


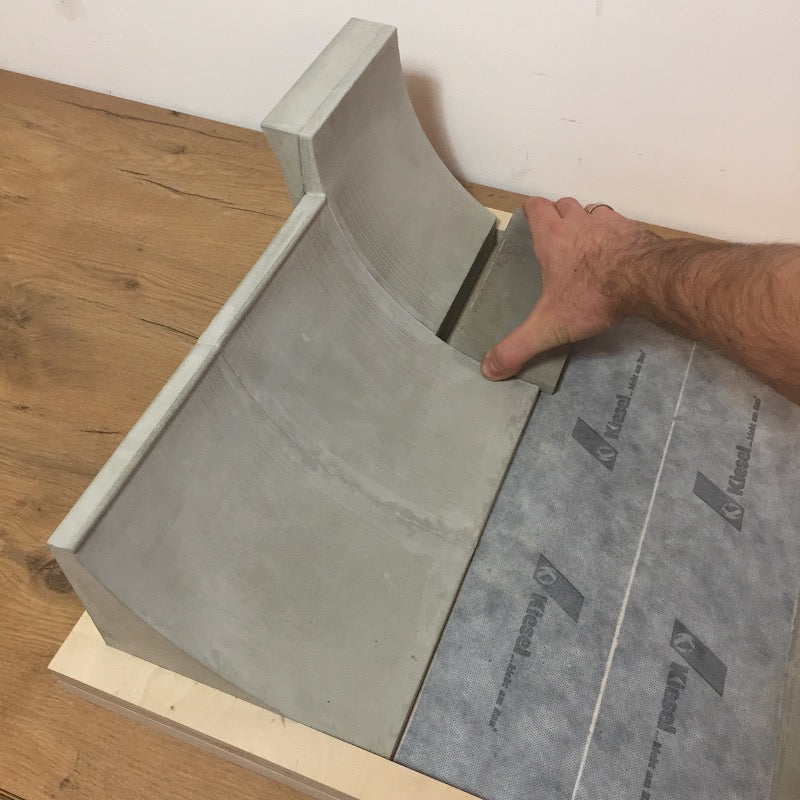
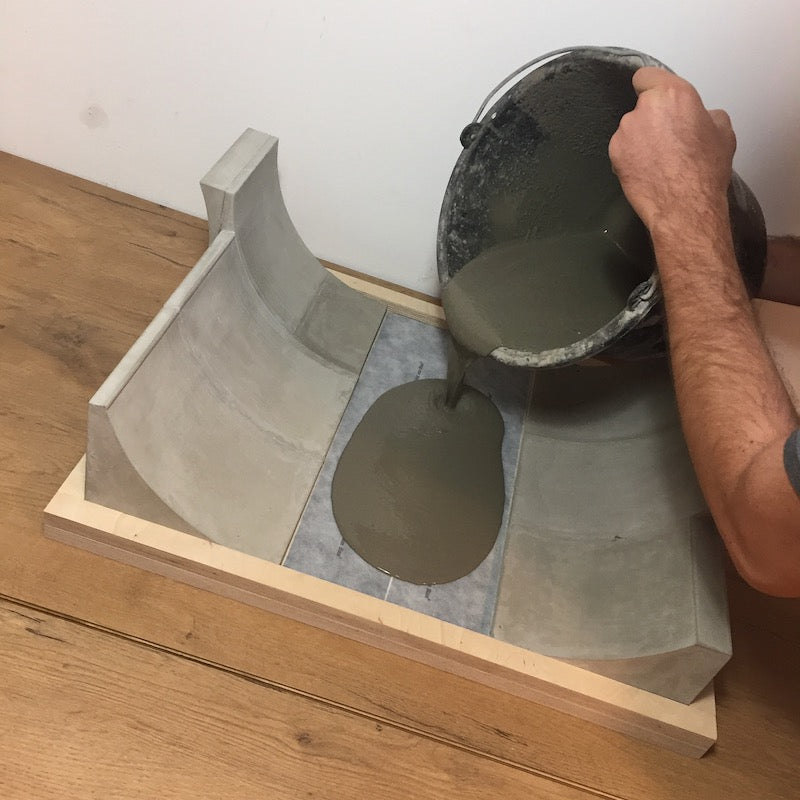
Step 3 - Fill in the Mold
- Fill in the mold and make sure the concrete flows in a long and thin pouring stream
- Every mold has a line in the silicon which is located 1 cm below the upper border. This shows where the socket of your ramps starts. If you want build a complete park (or a miniramp), you should always fill out the complete mold with concrete so you make sure your ramps got a socket and the flat can be poured out.
- If you want to build a portable obstacle (like a curb or a kicker) you should fill out the mold till the concrete reaches the socket-line.


Step 4 - Let the Concrete Cure
- Please take a look at the curing time on the packaging of your concrete
- The curing time depends on the temperature of your concrete powder and of course on the temperature in the room where the concrete cures. (our recommend concrete is ready to demold in 2 - 3 hours or less)
- If you're not sure if you can demold your ramp already you can easily check the concrete. If you can make an imprint with your fingernail in the concrete, you should wait a bit longer.

Step 5 - Open the Mold
- At first, put of the clamps and the rigid frame
- At second, you can pull off the silicone liner. Do not use to much force, so you don't rip the silicone


Step 6 - Sealing
- This is an optional step if you wanna make your ramps really durable even for outdoor use.
- If you use your ramp as a single, portable ramp, you can seal it now. If you want to build a whole park or glue another ramp on it, you should wait with sealing till your ramp is finished completly.

Quarter Mold special Features
Building a Table
The quarter mold contains a separate mold for a matching table which can be glued behind the coping. Works the same way as our other molds - fill in some concrete, let it cure and demold it. Can be used as table for your a small- , normal-, or vert-quarter as well as jersey barrier kind of ramp (if you glue a few together).


Building a Small Quarter (working with Mold-inlays)
We offer different kind of inlays for our molds so you can build even more different ramps with them. The only thing you have to do is putting the mold-inlay in the silicone like you see it in the picture:


Building a Vert-Quarter
The small quarter and a "table" can be combined (glued) to a vert-quarter.


Building a Park
Step 1 - Prepare (Build) the base and arrange the Ramps on it
You can build your own base by cutting a wooden board and putting a frame on it.

Step 2 - Glue the ramps together
Step 3 - Pour the Flat between the ramps

Step 4 - Seal the Concrete


